
The perfect cheesecake recipe. How to make cheesecake at home. Cheesecake with cherry jam
The classic cheesecake is an invention of British housewives, although the first mention of a cheese pie with a similar recipe dates back to Greek cuisine. Be that as it may, now cheesecake is more of an American dish, which has many recipe variations. In almost every European country you can find references to a cheese pie recipe, so this dish can conditionally be considered international.
Despite the fact that there are many recipes for making this pie, we can highlight some important details that contribute to the correct production of this wonderful pie.
Basic nuances of making cheesecake at home:
- The basis for the pie can be very diverse. Usually they use ready-made biscuit or crushed cookies. There is also a no-bake cheesecake recipe with many possible variations. To do this, all the ingredients are taken ready to eat, and then the formed cake is infused in the refrigerator. Some sources may include a recipe for cheesecake in a slow cooker in the cooking algorithm. This technique has long been established in our kitchens, and many housewives are happy to try a variety of dishes and even baked goods prepared in this way.
- The filling is the main component of the cheesecake. To obtain the ideal taste, it should not be too liquid, but should have a creamy consistency. The original recipe uses Philadelphia-style soft cream cheese. Subsequently, as usual, the composition changed slightly and now, for the most part, cheesecake is made from cottage cheese. To obtain a more delicate and uniform consistency, you need to add sour cream or cream. You can use a suitable cheese mass or even thick homemade sour cream. The taste will not suffer from this, but for our sweet tooth it will become more familiar. This will also have a positive effect on the cost of the finished dish, because the filling accounts for about 80% of the total volume of the pie.
- You don't need a special mold to make cheesecake. You can use a standard connector of a suitable size. For convenience, you need to cover the bottom and edges with baking parchment or use a silicone container. If the recipe does not require baking, the cake can be made directly in the cake pan for serving.
- Baking a cheesecake is an extremely responsible and important moment. Under no circumstances should you overdry the cake, otherwise all your efforts will be in vain. To prepare, you need to bake the cheesecake at a temperature of 150-180ºC for about an hour. The finished cake should jiggle a little around the center. If in doubt, you can leave the cake in the turned off oven for another fifteen minutes, and then cool.
- You can often come across recommendations that it is best to bake cheesecakes in a water bath. To do this, you need to take a slightly larger baking tray and place the main one in it. Pour water between the sides, usually about half the height of the baking sheet. Place the installed structure in the oven and bake in this way.
- The cheesecake should cool in a calm environment, away from drafts and temperature changes. It is not recommended to cover the cake with a towel or napkin, otherwise there is a risk of damaging the structure.
- You can add various fruits and berries, citrus zest (lemon cheesecake) and cocoa powder to the composition. The classic strawberry cheesecake has an excellent taste, the filling of which requires the addition of fresh or frozen strawberries.
Each housewife determines the complete algorithm of how to prepare cheesecake herself, and our selection of time-tested recipes will help you quickly make a choice and pamper your household with a tasty and healthy dessert.
The most delicious cheesecake recipes
The main ingredients can be replaced and arranged in different sequences. If the usual curd filling seems too bland, you can include orange or lemon zest in the composition, or you can pour chocolate glaze on top.
Most of the ingredients are harmless and therefore cheesecakes are widely used for children's parties as a tasty and healthy dessert.
Classic cheesecake recipe
For it we need Philadelphia cream cheese, which can be purchased in specialized departments and large supermarkets. Its delicate taste is perfect for this dish.
Required ingredients:
- Shortbread cookies - 300 gr;
- Butter - 150 gr;
- Soft cream cheese - 700 gr;
- A glass of sugar;
- 3 eggs.

How to make classic cheesecake:
Crush the cookies and mix with melted butter. From the resulting mixture form the bottom and sides of the base, level everything on a baking sheet. Heat the cheese to room temperature and beat it with the eggs, adding one at a time. At the end, add sugar and sour cream, mix everything well.
Pour the resulting filling onto a baking sheet and place in an oven preheated to 160-170º C. Bake for about an hour until fully cooked. Then cool carefully, avoiding sudden changes in temperature. To do this, you can leave the pie in the oven with the door open. After complete cooling, put the cheesecake in the refrigerator to soak for eight hours, or overnight. After such “hardening” it will become unusually tender and soft.
Curd dessert recipe
If you replace the rather rare and expensive cheese with regular cottage cheese, then this cottage cheesecake recipe will become more accessible even for everyday use. It is advisable to take cottage cheese with maximum fat content and uniform consistency. Ideally, it is preferable to use homemade products. To obtain the desired consistency, the cottage cheese is diluted with sour cream or cream.
Required ingredients:
- Ready-made sponge cake in the form of a baking sheet - 1 cake;
- Fat cottage cheese - 700 gr;
- A glass of sugar;
- Sour cream 20% fat - 150 g;
- 3 eggs.

How to make cottage cheesecake:
Beat cottage cheese with sour cream, add eggs and sugar one at a time. The resulting mixture should be thick enough so as not to spread over the mold. You can additionally wrap the sides with foil or parchment. Bake in an oven preheated to 180º C for about an hour. Then cool and leave in the refrigerator for at least three hours.
New York cheesecake recipe
The name itself already testifies to the American roots of this dessert. The recipe for New York cheesecake is extremely simple and requires baking in the oven. To do this, you can prepare the already known base from crushed cookies, and then start making the filling.
Want something interesting?
Required ingredients:
- Shortbread cookies - 150 gr;
- Butter - 70 gr;
- Soft cheese of any suitable variety - 650 g;
- Sugar - 100 gr;
- Sour cream or cream 20% fat - 200 ml;
- 2 eggs;
- Vanilla and salt to taste.
How to make New York cheesecake:
Mix the cheese with eggs, sour cream (cream) and beat with sugar. Vanilla sugar and a pinch of salt are added at the end, put everything into the finished base.
It is advisable to bake in a water bath for about an hour. Leave in the switched off oven to cool completely, then transfer to the refrigerator. The pie turns out surprisingly tender and delicious.
With added banana
In order to prepare banana cheesecake, you need to add a banana, crushed into a puree, into the cheese or curd mass. Banana cheesecake with cottage cheese has an excellent taste and is especially suitable for little ones with a sweet tooth. Thanks to this duet, the dessert will become not only tasty, but also healthy.
With added chocolate
You can prepare chocolate cheesecake according to any of the suggested recipes by adding a little chopped or melted chocolate.
The best option is to pour chocolate glaze over the finished cake.
This must be done after it has completely hardened so that the chocolate does not flow. This is an incredibly tasty dish, which is also distinguished by its original appearance and elegant presentation.
Healthy option with pumpkin
It’s simply impossible to pass by such a recipe! The healthiest autumn vegetable is in perfect harmony with the other ingredients in this dessert. This pumpkin cheesecake recipe will definitely add to your family cookbook, and will also become one of your favorite dishes for daily tea drinking.
Required ingredients:
- Cookies for the base - 300 g;
- Butter - 100 gr;
- Pumpkin - 900 gr;
- Soft cheese - 300 gr;
- Cream - 250 ml;
- Milk - 100 ml;
- Gelatin - 2 packs.

How to make pumpkin cheesecake:
Bake the peeled and washed pumpkin in foil in the oven until the flesh is soft. After this, beat in a blender until the consistency of puree. Add cheese, powder and beat again. Make a base of cookies and butter according to the above recipe.
Pour milk over the gelatin and leave until it swells. Heat and dissolve in warm liquid, leave to cool. Beat the cream well, add dissolved gelatin and cream to the chopped pumpkin and beat everything with a blender or mixer.
Place the resulting mixture on the prepared base, level it well and put it in the refrigerator overnight to soak. Decorate to your liking before serving.
Cooking with mascarpone cheese
The exceptionally delicate taste of this dessert can surprise the most capricious gourmet. Soft Mascarpone cheese is used to prepare it, so the taste of sunny, cheerful Italy clearly comes through in this dish.
Required ingredients:
- Cookies for the base - 300 g;
- Butter - 100 gr;
- Mascarpone - 500 gr;
- Cream - 200 ml;
- Granulated sugar - 150 gr;
- Gelatin - 2 packs.

How to make cheesecake with Mascarpone:
Mash the cookies and mix with butter. Then put it in the mold, forming the base, as described earlier. Soak the gelatin in cold water, the volume of which will be indicated in the instructions on the package (may differ from one manufacturer to another), usually half a glass of water per pack of dry mixture.
Beat sugar and cream with a mixer until thick foam. Then add mascarpone, stirring thoroughly, but not whipping - the mixture should not be too airy.
Heat the dissolved gelatin over low heat, without bringing it to a boil. Gradually pour into the creamy cheese mixture and stir until smooth.
Spread the resulting mixture onto the prepared cookie base, level it well and leave in the refrigerator until hardened for 2-3 hours. This recipe does not require baking, which saves a lot of time. The finished pie can be decorated with grated chocolate, berries or fruits.
Cheesecake recipe in a slow cooker
To cook cheesecake in a slow cooker, you need to select the appropriate mode. A base of cookies or prepared biscuit is laid out at the bottom of the container. The filling can also be taken from any recipe you like. Afterwards, select the appropriate mode and in a few minutes your pie will be ready. Cooking time depends on the multicooker model and should be indicated in the recipe book.
To quickly and accurately remove the finished cake from the container, you can use a steaming bowl.
The pie is turned over onto its bottom, and then carefully onto a plate or dish. Next, you need to proceed according to the technology described above: the cake first cools naturally and then “rests” in the refrigerator; the advantage of this method will be faster cooking and a guarantee of a good result.

No Bake Cheesecake Recipe
For this recipe, you need to take only ready-made ingredients: biscuit or crushed cookie crumbs mixed with butter. The filling must also be completely prepared, so there are no eggs in this recipe. A simple no-bake cheesecake can be made using the following ingredients.
Required ingredients:
- Cookies for the base - 300 g;
- Butter - 100 gr;
- Soft cheese or cottage cheese - 600 g;
- Cream or fat sour cream - 200 ml;
- Granulated sugar - 150 gr;
- Gelatin - 2 packs.

How to make cheesecake without baking:
Pour gelatin with water, leave and heat until completely dissolved. Then strain from solid residues and mix with pre-whipped cheese, cream and sugar. Pour the mixture into the prepared base of cookies and butter and leave to harden in the refrigerator overnight. Serve garnished with berries or chocolate chips to your taste.
This pie can be immediately prepared in a decorative cake pan to ensure beautiful and impressive presentation.
Dietary option with minimal calorie content
Despite the fact that the calorie content of cheesecake is quite high: approximately 400-600 kcal/100 g, it is quite possible to consume such sweets during a diet. The main secret is to replace some ingredients with lower calorie ones.. Thus, you can reduce its nutritional value to approximately 300 kcal/100 g. and at least occasionally indulge in tasty treats while on a diet.
Required ingredients:
- Cookies for the base - 180 g;
- Butter - 90 gr;
- Soft cheese - 200 gr;
- Cottage cheese - 200 gr;
- Yogurt - 200 ml;
- Eggs - 2 pieces;
- Granulated sugar (powdered) - 150 g;
- Vanillin - 2 teaspoons.

How to make diet cheesecake:
Grind the cookies and mix with butter. Place a thin layer into the prepared baking dish, not forgetting to make two to three centimeters of edges. Bake the resulting mixture for ten minutes in an oven preheated to 180º C.
Mix all other ingredients and beat with a mixer until smooth. Gently distribute the resulting mass over the base and bake in a water bath for about half an hour. Then cool and put in the refrigerator for final soaking for 3-4 hours. Before serving, you can decorate with fruit and grated chocolate chips.
Cheesecake is a versatile dessert, simple and yet surprisingly delicious. To prepare it, you can choose a minimum of products, and the process itself will not take much time. The best option is a no-bake cheesecake with cottage cheese; it can be prepared for a child’s birthday or just for the arrival of guests.
Curd cheesecake in a slow cooker turns out to be unusually tender; the main thing is to choose the appropriate mode. Such a solution will further simplify the task and make preparations almost automated. Our article contains several of the best recipes for making cheesecake, so you can safely start and try at least one of them.
Cheesecake- a classic dish of American cuisine, which has firmly entered the menu of cafes around the world. It is quite simple to prepare, and the result is an incredibly tasty and tender dessert. We will make classics of the genre - Cheesecake New York. Shall we try to cook?
The hardest part about making cheesecake is finding the right cream cheese. According to authentic recipes, Philadelphia cheese is used. The main disadvantage of this cheese is that it is now very difficult to find in stores in Russia. In search of analogues, I tried many different cheeses and settled on the Danish curd cheese Arla Natura Creamy. But at the present time, again, it is not available in Russia, so you have to buy Russian-made curd cheeses, of which there are only one or two on the shelves and that’s it. For example, Bon Cream Creamy cheese turns out very well, and it’s also one of the most budget-friendly options at the moment. I also think Almette Creamy and Hochland Creamy would be suitable.
No processed cheeses, cottage cheese, sour cream or Mascarpone are suitable. And even more so Cream Bonjour and other less healthy cheeses. We're not making a casserole.
Total preparation time for cheesecake: 8-10 hours (including its “ripening” in the refrigerator)!
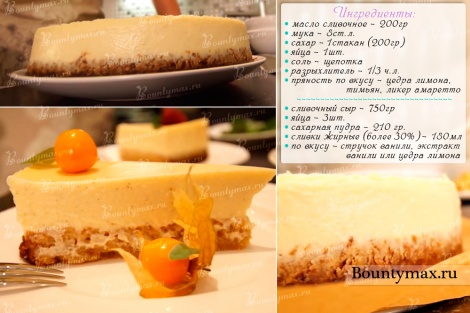
Ingredients
- shortbread cookies 300 g
- butter 100 g
- cream cheese 600 g
- sugar 150 g
- eggs 3 pcs.
- cream 30-35% 200 ml
Instead of heavy cream, you can use 20% cream.
The amount of ingredients is calculated for baking in a mold with a diameter of 20-22 cm; for a mold with a diameter of 26 cm, we increase the amount of ingredients by 1.5-2 times, unless, of course, you like a low cheesecake. If you are going to prepare a cheesecake version without sides, only with a shortbread base, then use 150 g of cookies and 50 g of butter.
The final weight of the cheesecake is approximately 1.5 kg.
Preparation
We take out all the necessary products (eggs, cheese, cream and butter) from the refrigerator in advance and leave them to “warm up” to room temperature.
After 30 minutes we take up the base - a sand layer. To do this, take any shortbread cookies you like. White, dark, with nuts - any. I used baby biscuits that contain butter rather than margarine. It's a small thing, but nice. You can do it yourself.
Preparing shortbread crumbs. To do this you need to grind the cookies. The easiest ways are a blender or food processor. The method is a little more complicated: crumble and roll the cookies placed in the bag with a rolling pin. 
At this point, our oil has melted on its own, has become plastic and is ready for further work. I do not recommend melting the butter, as it is distributed in the shortbread crumbs in the form of drops, is poorly retained and will leak out during baking.
Combine crumbs and butter. You should get a loose mass. 
Now pour our mixture into the mold. It is best to use a springform pan; I have a pan with a diameter of 24 cm. The bottom can be covered with baking paper - it will be easier to remove the cheesecake. We compact an even layer with something flat - for example, the bottom of an aluminum mug. You can make it with sides, or without, I love it when the cheesecake has a side. Place the finished base in the oven for 5-10 minutes, preheated to 180-200°C. After this, remove from the oven and leave to cool. 
Now for the cheesecake itself. Mix the curd/cream cheese and sugar well until smooth. The easiest way to do this is with a mixer. But! We just need to mix evenly, not beat! So we do everything at minimum speed, otherwise bubbles will appear and our cheesecake will look like holey cheese. 
Add eggs one at a time. Mix the mixture very well after each addition of the egg. Let's take our time. We try not to beat the mixture too much - if the mixture is oversaturated with air bubbles, the cheesecake may swell and crack during baking. Therefore, now we work not with a mixer, but with a spatula or whisk. 
And at the very end, add the cream (no need to whip it) and mix gently again. Pour the filling into the mold with the base. 
Lightly tap the pan on the table a couple of times (this way we will avoid bubbles and unevenness of the dough, since those bubbles that are close to the top border of the cheesecake will come out). 
Next we will bake the cheesecake. All sorts of different recipes on the Internet suggest wrapping the pan in foil, pouring water into the pan and essentially baking it in a water bath. This is done so that the cheesecake does not rise too much and does not crack. But in the end, we only have a wet base and difficult preparation. We will bake like this: first put the oven in a preheated 200°C oven for 15 minutes, then reduce the temperature to 110°C and cook the cheesecake for about an hour. It all depends on some features, for example, the diameter of your mold. Here's how to guide yourself: the center of the cheesecake should jiggle a little (if you move the pan), but not be too liquid. It took me 15 minutes + 1 hour to bake the cheesecake in a 24 cm pan. I usually place the baking sheet a little closer to the bottom of the oven. If you are afraid that the top of your cheesecake will burn, then prepare a sheet of foil in advance so that if something happens, you can cover the top of the pan. Cheesecake loves to be watched while it's in the oven, it's important not to neglect it. You don’t need to monitor it all the time, but once every 5-10 minutes you should look through the glass at the condition of the cheesecake. If towards the end of cooking the top of the cheesecake begins to lift and crack, this is a clear sign of over-baking.
But that is not all. It is also important to refrigerate the cheesecake properly. If you take it out of the oven quickly, it will probably crack. Why do we need cracked cheesecake?! The cheesecake needs to be cooled in several stages. Immediately after turning it off, it must be left for 40-60 minutes in the oven with the door ajar, then kept for half an hour at room temperature. Next, you need to run a knife along the walls of the mold, and after that put it in the refrigerator. Gradual cooling greatly reduces the risk of cracks in the cake! 
Cheesecake New York It turns out very tender and homogeneous. The texture is like a very soft curd mixture. To get the full flavor, the cheesecake should be in the refrigerator for at least 6-8 hours; I always leave it overnight and the morning will be happier with a great dessert for coffee. Here you can again train your willpower. The peak of taste occurs on the third day, this is no joke. We must assume that after turning off the oven, the cheesecake cooking process is not over. When cooled and in the refrigerator, the cheesecake continues to cook, but in a slightly different sense from our usual understanding.
If desired, you can place pieces of juicy ripe fruit or berries on the cheesecake. Or serve it classic - pure cheesecake with a mint leaf and a little strawberry sauce. Bon appetit! 
By the way, there is another option to cook if you really really want chocolate to lift your dull mood. But if you are too lazy to bake a cheesecake or don’t have an oven, then pay attention to the recipe. 
Why do we love classic cheesecakes? For its unusual taste for a Russian, raised on butter and cream cakes, for its creamy texture, silkiness and unobtrusive sweetness. Until recently, cheesecakes seemed incredibly exotic to us, but today almost every Russian woman knows what they are and has even tried to cook them.

There is a stereotype that cheesecake is a cosmically complex dish that only famous pastry chefs can do. Believe me, this is not true. There are some subtleties in classic cheesecake recipes, knowing which you can prepare an amazing cake the first time. I’ll tell you everything I know about cheesecakes – and you’ll definitely succeed!
I made my first cheesecake 4 years ago. Moreover! I did this in a gas oven without a thermometer, since I was temporarily not living in my apartment due to renovations that had fallen on my head. That’s how strong the desire was to bake it myself. And it worked. The first time!
What to say? It tasted no worse than the restaurant one. And even the cracks that so scared the venerable chefs avoided my cheesecake. Since then, I have tried many variations - with chocolate, with Baileys, with lemon zest, three-layer with pieces of cookies and chocolate cake... But today I will tell you how to cook exactly that Classic Cheesecake. Once you try it, you will fall in love forever, that's for sure.
- Total cooking time – 3 hours 0 minutes
- Active cooking time – 0 hours 30 minutes
- Cost – high cost
- Calorie content per 100 g – 310 kcal
- Number of servings – 6 servings
Choose where to save the recipe:
Want to keep this recipe for yourself?
Choose where:
How to make classic cheesecake
Ingredients:
- Cookies – 200 g ("Jubilee")
- Butter – 100 g
- Cream cheese – 600 g (Philadelphia)
- Powdered sugar – 150 g
- Chicken egg – 3 pcs.
- Cream – 150 ml (fat content 33-38%)
- Vanillin – 1 g (or a teaspoon of vanilla sugar)
Preparation:
About cheese.
By Classic Cheesecake, I mean New York Cheesecake. That's why! Only the right cheese for its preparation is Philadelphia. But, since we do not live in America, it is quite problematic to get it even in Moscow. So, for starters I’ll tell you what can replace it.
The three pillars of foreign cream cheeses are Philadelphia, mascarpone and ricotta. If you were lucky enough to buy the first one, congratulations, then you don’t have to read the next paragraph, and you will get a real New York cheesecake. If not... I recommend turning to domestic analogues.
The Karat company now makes very good cream cheese. It’s called “Cream Cheese” and is sold in blue tubs in the style of their world-famous processed cheeses. Its texture is dense, creamy, and the taste is salty - just what we need.

I also recommend paying attention to Buko and Horteka cheeses. I saw them in one and a half liter buckets... a little expensive, of course, but enough for exactly 2 cheesecakes :) Many people take creamy curd cheeses “Rama” or “Almette” - this is not quite the same, they are a little looser and saltier, but, in principle , they can also be used.
Cheesecakes with mascarpone they turn out to be fattier (80% fat is no joke), heavy and sweet, since mascarpone is a completely unsalted cheese. Therefore, if you have mascarpone, reduce the amount of powdered sugar by about a third. And I personally recommend decorating such cheesecakes with fresh berries - to dilute the excessive sweetness and density.
Cheesecakes with ricotta They are already eager to taste cottage cheese. Ricotta is loose, just a little salty, reminiscent of our domestic cottage cheese, only more delicate. When buying ricotta for cheesecake, be sure to look at the expiration date - this young, delicate cheese spoils very quickly!

And finally, cottage cheese. Yes, you can replace cream cheese with cottage cheese. But it will already be cottage cheese. Or even a casserole. Tasty, of course, but... not that. Cottage cheese has a more sour and sharp taste than cream cheese, and an uneven texture to boot. However, if you can’t find anything at all, take the cottage cheese and rub it through a sieve to get rid of lumps, and then you can also grind it with a blender to be sure.
Although you can find many recipes on the Internet on how to make cream cheese at home, I do not recommend it. You won't save money. A large amount of cream produces a small amount of cheese. And heavy cream will cost no less than a jar of cream cheese.
At one time I was fond of homemade cheeses and realized that the best cheeses are made with sour natural milk. The rest are not at all budget-friendly and are inferior in taste to store-bought counterparts.
So, I talked about cheese for the classic cheesecake recipe. Now let's move directly to the process.
The proportions are calculated for a springform pan with a diameter of 20 cm.
First, remove the cream cheese, eggs and cream from the refrigerator. All ingredients for cheesecake should be at the same room temperature.
Preheat the oven to 160 degrees.
Preparing the crust.

To do this, in a food processor fitted with a blade attachment, grind the butter and cookies into fine, almost uniform crumbs.

The finished mass will easily come together. What nuances might there be? How to replace "Jubilee" cookies? Ordinary shortbread cookies, any kind, but preferably without flavorings and fillers such as raisins. If you don’t have a food processor, the cookies can be crushed with a mortar or rolled out with a rolling pin, and then mixed with soft butter.

The finished cheesecake mixture can be compacted along the bottom and walls of the springform pan to create a cheesecake with sides. Or you can make only the bottom out of cookies - both options are quite acceptable. I settled on a cheesecake with sides.

Place the cake in the oven for 10 minutes, then remove it and cool.

Preparing the filling. To do this, carefully mix the cream cheese with a whisk with powdered sugar.

Do not replace powdered sugar with sugar, this is important in a classic cheesecake recipe! We want the texture to be as uniform, soft, and creamy as possible, and the sugar may not completely dissolve. If powdered sugar is difficult to buy, grind the required amount of sugar in a coffee grinder.
Add vanillin. It also needs to be ground in a coffee grinder first. It is better, of course, to use vanilla extract - after all, natural flavoring is always more advantageous than artificial one. But finding it can be problematic. If you have it, add 1 teaspoon instead of vanilla.

Add eggs one at a time and mix gently.

Important! In this recipe, you cannot beat the cheesecake filling, just stir it! Move the mixer away. If you beat the cream too vigorously, it will fill with air, which will subsequently lead to the formation of cracks on the surface of the cheesecake. Therefore, mix slowly, thoroughly, carefully and briefly.

Add cream, stir to obtain a homogeneous mass.

Important! The cream should be full fat. Not less than 33%. Do you see how it is in my photo? This is what they look like even without beating. Do not replace them with less fatty options, because the result will be unpredictable.
Don't bake the cheesecake longer! This is not a cake, it should not be dry. If the middle shakes a little, this is completely normal for the classic recipe. But don’t rush to take it out of the oven, so as not to get insidious cracks.
Turn off the oven, open the door slightly and leave the cheesecake inside for an hour. I usually wait until the oven has completely cooled down before removing the item.
Take the cheesecake pan out of the water container and remove the foil. Do not remove the cheesecake from the mold immediately after baking! It should spend at least 4 hours in the refrigerator.

So, we put it in the refrigerator and wait. Then we carefully run a knife along the walls of the mold, remove the sides, take out our cake and enjoy.
A classic cheesecake does not need additional decorations or toppings. However, nothing prevents you from serving it by garnishing it with fresh berries or topping it with berry sauce. If you are not very happy with the appearance, whip the heavy cream with powdered sugar and coat the cake with it.
I moved on. I covered it with chocolate glaze and decorated it with a pile of different candies - American marshmallows, pieces of domestic chocolate and crumbled cookies. But this is only because my spoiled family is tired of the classic cheesecake, give them something more complex. I strongly recommend that you first try the cheesecake in its original form, without decorations, in order to fully appreciate its delicate, delicate taste and airy texture. Bon appetit!

Cheesecake – just the word makes your mouth water! If this is not the case for you, then you simply haven’t tried the “proper cheesecake” yet. Well, or you haven’t found “your ideal recipe” for this amazing dessert, so popular in America and firmly included in the menu of most restaurants in our country.
Let's not delve into the history of origin, let's just say that cheesecake is of European origin. However, cheese pie has taken root in America to such an extent that it has become a classic American dish. And now the cheesecake, prepared according to the classic recipe, proudly bears the title “New York”.
It is New York cheesecake that we will learn how to cook at home: we will look at the main points and several valuable recipes with step-by-step photos and video instructions.
Learn how to make a classic cheesecake and you can make any other! Because, in theory, a classic cheesecake is a base to which you can add various flavors (all kinds of flavors, berries, syrups and toppings, etc.).
How to make cheesecake at home
The perfect cheesecake is every housewife's dream. And by the way, if you take into account small tricks, everyone can prepare a perfect dessert. Therefore, before moving directly to the consideration of recipes for the classic New York cheesecake, pay attention to reading the “helpful tips”.
The best cheese for cheesecake
Cheese is the main component of cheesecake. Therefore, the very first reasonable question that comes to mind is: what is the best cheese to buy for cheesecake?
The composition should not contain fats of vegetable origin, only dairy sources.
To make cheesecake you need cream cheese - ideally Philadelphia cheese. However, it is often difficult to obtain or the price is prohibitive.
What can you substitute for Philadelphia cheese?
Philadelphia cheese can be replaced with analogues, such as:
- Curd cheeses: Almette, Unagrande, Hochland "creamy", Zuger Frischkase;
- Creamy: Violetta, Bon Cream, Arla Natura;
- Cream cheese (Cremcheese): Hochland Cremette, Unagrande, classic "Baltais";
- Cheese for confectioners Mana;
- Soft cheese "Syrko".
Mascarpone cheese is not suitable for making heat-treated cheesecake. But it is used very successfully when making no-bake cheesecake.
However, you can experiment: mix cream cheese (Philadelphia or any other analogue) with mascarpone cheese 50% to 50% when preparing a cheesecake with pastries - the texture of the finished cake will be softer (you will get a more “creamy” cheesecake). This is, as they say, a matter of taste and color...
As a matter of fact, in search of the ideal texture, you can combine cream cheeses with each other (for example: Almette + Hochland, etc.). Well, a few words about cottage cheese, yes, instead of cheese you can use cottage cheese, BUT it will be something different than a classic cheesecake. For those who need a recipe for cheesecake with cottage cheese, I advise you to look at.
It is important to know:
- It is better to remove all ingredients from the refrigerator 30 minutes before cooking. So that they are at room temperature. This will make it easier to obtain a uniform, smooth texture;
- It is best to use a springform baking pan (this way you can easily remove the finished dessert from the pan). In addition, since the base of the cheesecake consists of cookie crumbs mixed with butter, the bottom of the pan should be lined with parchment paper for baking (again, for careful removal of the cake);
- Try to choose high-quality cookies (you can even make homemade cookies - below we will show you a couple of options);
- Most recipes call for melting the butter before mixing it with the cookie crumbs. However, you can simply use softened butter;
- You need cream with a fat content of 30-35%, or 20% sour cream (note that depending on what you choose, the taste and density will be slightly different);
- When mixing cheese with other ingredients, use the mixer on low speed (or stir by hand). You just need to mix the ingredients together - never beat! If you add cream to the cheese mixture, you don’t need to whip it first either! Just pour it as it is – liquid, and stir it carefully.
Otherwise the cheesecake will crack! Whipped cream is cream and air, and the presence of air in the mass of a cheesecake is a bad thing and leads to the fact that during baking the air tries to get out of the trap and the cheesecake cracks.
How to bake cheesecake
Most recipes state the absolute need to bake the cheesecake in a water bath. In fact, you can do without this troublesome method. However, both of them have their place - so we’ll talk about both.
Why is cheesecake baked in a water bath?
Cheese is a rather delicate product that requires gentle handling - and accordingly, a pie made from it requires the same. It needs to be baked slowly and evenly, so it will not rise and, as a result, crack (in fact, we are afraid of cracks).
Now the method itself. A water bath is created not by placing a pan of water at the bottom of the oven, but by directly immersing the pan with dough in a large diameter pan filled with hot water.
This is where a difficulty arises for many - to make a pie you need a mold with a split bottom. How can you prevent water from seeping into the cake and soaking the entire base? In fact, it is quite simple to wrap it in a couple of layers of foil, and that will be enough.
If you have narrow rolls of foil, look at the photo for instructions on how to wrap the form as securely as possible.
In addition, below, when you get to specific recipes in the video lessons, you will also see both options.
So, the first method: tear off 4 identical pieces of foil from the roll and connect them in pairs. Just put two leaves together and fold them at one edge (as shown in photo 1-2), fold them several times. Then we open it like a book - in the end we get one large sheet (photo No. 3).
We do the same with the remaining 2 halves.
As a result, we get two squares - we lay them on top of each other (we place the seams crosswise). Place the mold in the center and wrap the edges of foil No. 5-6.

Second way. We also tear off four strips of foil and lay them on top of each other in a star pattern. The first two are crosswise (photo No. 2) and the remaining ones are diagonal.

Place the packaged mold in a mold with a large diameter (baking tray with high sides), pour the cheese mixture onto the base crust. Place in the oven on the lower rack and pour boiling/hot water into the large pan (be careful not to pour the water into the dough).
Why on the lower level? - The top of the cheesecake should not be browned, but the bottom will be fine thanks to the water bath.
Baking modes with water bath(baking tray on the lower level, heats both top and bottom):
- 160 degrees Celsius 1 hour 20 minutes;
- 150°C 1.30 minutes;
- 180°C 45 minutes + 160°C 30 minutes.
Baking tray in the middle, warms the bottom:
- 160°C 60 minutes (mold diameter 20cm) or 1.5 hours (mold diameter 25-26 cm).
In general, the temperature and cooking time depend on the characteristics of your oven. The water in the pan should be boiling slightly (bubbling, but not bubbling).
The finished cheesecake is firm around the edges, but slightly jiggly in the middle (if you overcook it, it may crack again).
A variation of the water bath “for the lazy”, place the cheesecake on a wire rack in the middle. And a baking tray with water right under it! It turns out great! In addition, cooking time is reduced.
Experiment, gentlemen!
Baking modes without a water bath(place the baking sheet in the middle or one division down, top and bottom):
- 200°C 15 minutes + 110°C hour – hour thirty;
- 200°C 10 minutes + 105°C hour fifteen – hour thirty minutes;
- 200°C 10 minutes + 105°C 25 minutes + turn off the oven and leave for 1 hour somewhere in the middle (meaning after 30-40 minutes) open the oven slightly.
If the top starts to brown, simply cover it with a sheet of foil. In addition, without a water bath, someone may encounter a problem in the form of an “overcooked base” (cookies). If you encounter this problem, next time place a second rack at a lower level and place a sheet of foil on it so that it is under the pan. This will reduce the heat from below and the base should not burn.
For those who have a gas stove (it is difficult to maintain the temperature - some do not have a temperature below 150 degrees) you can finish baking the cheesecake with the door slightly open.
Ideally, it would be a good idea to purchase an oven thermometer.
Option for you:
- 15 minutes at 210°C (this is six somewhere on gas), then 30 minutes at 150°C (at the very minimum - 1ka) and at the end of 30 minutes with the door slightly open.
How to cool cheesecake
And the last but not least step is cooling down. It is very important not to expose the baked pie to sudden changes in temperature. Otherwise, it might crack here too!
So, we will cool it in several stages:
- After turning off the oven, slightly open the door and leave the cake standing there for 30-60 minutes;
- Next, remove it from the oven and leave it at room temperature, again for at least 30 minutes;
- Then use a damp knife to run along the sides of the mold (separate the cheesecake from the mold, but do not remove it). This is necessary because with further cooling it may settle a little more, and if the edges adhere to the mold, cracks may appear around the perimeter and in the middle;
- Many people put the cheesecake in the refrigerator, covering it with cling film or foil. I would not recommend doing this because droplets of condensation form on the surface of the film and it drips onto the cake;
- Place in the refrigerator for 6-8 hours.
The longer your cheesecake sits in the refrigerator, the better. By the way, true gourmets believe that the full taste of cheesecake opens by the third day!
Classic cheesecake with baking recipes with photos step by step
Don’t be intimidated by the large amount of text above - the whole difficulty lies in the individual characteristics of the ovens. But every housewife knows her stove, so don’t let baking cheesecakes at home scare you. In order to finally dispel your fears, below we will consider specific recipes with photos and video lessons.
Cheesecake in a water bath in the oven

Since we are talking about the classic New York cheesecake, I simply have to show you the “original recipe” from Martha Stewart herself! Please note that this recipe requires flour to be added to the cheese base.
The rest of the recipes will be more “Russified” or something (without flour/starch), however, we have prepared a separate article with recipes from Anna Olson and other famous authors.

And now a small deviation from the “norm” - shortbread cookies (in our country they are most often used) and we will mix the crumbs not with butter, but with milk (instead, you can take water or coffee - for chocolate cookies). In this design, the sand base turns out to be soft (not dry).
Well, another recipe - this time with “homemade cookies” at the base (more precisely, there is a whole shortcrust pastry cake below). And by the way, this recipe involves cream cheese + mascarpone cheese (60% to 40%, 450 g of cream cheese + 300 g of mascarpone).
Cheesecake recipe without water bath
I’ll start this collection of recipes with a couple of recipes with the addition of cornstarch (don’t throw slippers at me - a little starch makes the cheese feel like “silk”).
By the way, the recipes from the previous collection can also be prepared without a water bath! In this collection we will look at recipes that differ only in tiny proportions. As I already said, everyone has their own “ideal cheesecake recipe”! - Choose yours!

For detailed instructions, watch the video.
The next Andy Chef cheesecake recipe differs from the previous one only by the additional addition of 2 yolks. The preparation process is the same.

And the third option - art lunch cheesecake - is as simplified as possible.

The amount of cream is increased, and the sugar is reduced (flavors in the form of lemon juice and zest can be added, or you can do without them).
In addition, according to this cheesecake recipe, the cookie base was prepared with simply softened butter.
Everything else is the same:
- The cookie crumbs were mixed with butter, placed in a mold lined with parchment, compacted well and placed in an oven preheated to 200°C for 10 minutes. Then let it cool;
- Meanwhile, the cheese was mixed with sugar, the eggs were added one at a time (after each addition, stir well) and at the end the cream was poured in (not whipped - regular liquid cream), and everything was carefully mixed again until a homogeneous mass was obtained;
- Pour the resulting mixture onto the cooled cookie crust, knock on the table a couple of times (to expel bubbles);
- Place the pan on a medium level in an oven preheated to 200°C for 10-15 minutes, then reduce the temperature to 105-110°C and cook for another 60-90 minutes.

I have already described above how to properly check the readiness and cool the cheesecake - I won’t repeat it.
Classic cheesecake recipe at home without baking
The hot version is considered to be American, and the cold version is considered English. With cold everything is much simpler, but no less tasty. The cold one tastes like a creamy ice cream, and the hot one tastes like... mmm, a creamy casserole, I don’t know how to more accurately describe the taste. In any case, it’s delicious either way – you can alternate cooking them!
Moreover, a classic no-bake cheesecake will not cause any difficulties at all, because it does not need to be baked for a painfully long time, observing the temperature regime, and cooled. All you need is the ability to handle gelatin.
Since the article has already turned out to be long, let’s look at one classic cheesecake recipe; read more about no-bake cheesecake here.
So, mascarpone cheese and (attention!) whipped cream are added to the no-bake cheesecake.
Instead of mascarpone cheese, you can use the same cream cheeses that we talked about at the beginning.
And one more difference is gelatin. Here you need to take into account the fact that the gelatin must stand in water for an hour (swell). Therefore, in this recipe, we start cooking by soaking the gelatin. Of course, if your gelatin requires it (in general, read the instructions on your package).
And by the way, no-bake cheesecake is usually topped with fruit or berry jelly.
Cheesecake without baking with photos step by step

Detailed instructions in the photo step by step and text explanations below.

- Pour gelatin for cheese (20 g) with 100 ml of boiled cooled water, and for jelly (10 g) with strawberry juice (or any other juice of your choice). Forget about the soaked gelatin for an hour. Just during this time you can prepare the base.
- For the base, crumble the cookies;
- Mix it with melted butter;
- Line a springform pan with parchment paper, place the cookie crumbs on it, distribute them evenly and tamp them with a glass with a flat bottom. Place the mold in the refrigerator;
- Bring the gelatin soaked in water to a boil, but do not boil, put it aside for now (let it cool a little). For filling ;
- Add mascarpone cheese to them, stir gently until smooth. Pour in the dissolved gelatin and mix again;
- Pour the resulting creamy mixture onto the cookie crust. And put it in the freezer for 10-15 minutes (we need the top to set so that the berries do not sink - put strawberry pieces on top under a layer of berry jelly);
- Meanwhile, heat the gelatin with berry juice. Cut the strawberries into thin pieces. Then we spread it beautifully on the surface of the cheesecake and (attention!) do not pour out all the berry jelly at once (otherwise the berries will float unevenly and it will not be beautiful), but carefully pour a small amount between all the berries with a spoon. And again put it in the freezer for a few minutes;
- Then pour out all the remaining jelly and now put the cheesecake in the refrigerator for several hours, or even overnight.
The result is simply excellent!

In this no-bake cheesecake recipe, we used 20 g of gelatin - this is quite enough, but some people like a “thicker” texture, so you can increase its content to 30-40 g (but you cannot reduce it).
Use different fruits and berries and you will get a “new cheesecake” every time. So you will never get tired of it! After all, that’s why it’s a classic cheesecake! In addition, they are perfect for: raspberries, cherries, peaches, pineapples, pears, blueberries, etc.


In addition, if desired, you can add pieces of fruit to the cheese filling of the cheesecake itself.

To summarize, I can say one thing: classic cheesecake is a dish with which you can experiment endlessly! Inspiration to you and successful experiments!
I noticed that cheesecakes are very popular among you, my dear readers. But every time you have questions related to different moments of preparation. And the questions are, for the most part, the same. In order not to duplicate the same thing every time, I am writing this post. A link to it will appear in every cheesecake recipe.
Preparatory stage
Form for baking
Ideally, the form should be detachable. This ensures that you can painlessly remove the finished cheesecake from it without damaging it. Some people manage to remove the cheesecake from the one-piece pan by turning it over. This option is only suitable if you are going to eat the cake at home and do not set yourself the task of impressing someone with its beauty. Because the risk that the cheesecake will not come out of shape without loss is quite high. Alternatively, you can remove the cake from the one-piece mold in pieces - cut into the required number of slices and place each on a plate. But at the same time, you risk scratching the bottom of the mold, which is unacceptable in the case of a Teflon coating.
The recipes on my blog are designed for a mold with a diameter of 21-22 cm. You can bake in molds with a larger diameter, but in this case the cake turns out thinner and takes a little less time to bake.
The most popular and most painful question is what cheese, other than Philadelphia, can be used to make cheesecake.
It has been experimentally found that good results are obtained with the following cheeses:
- Almette curd
- Rama Cream Bonjour

- Buko Classic

- President Creamy

- “Viennese breakfast” (for Belarusians) – the taste is almost identical. Be sure to take it only without additives, in a yellow jar.

I personally don’t consider the penultimate option acceptable, but many comrades who have made cheesecakes with “President” claim that the result is good. So let it be on the list.
The result is unlikely to be identical to Philadelphia, but it will also be delicious.
Regarding Philadelphia itself. This cheese does not resemble processed cheese either in consistency or taste. It tastes slightly salty, but you shouldn’t be afraid of this - the sugar in the filling smoothes out this saltiness.
Let's start cooking
Filling
How you prepare the cheesecake filling will directly determine the texture of the final product.
The cheese should be at room temperature before cooking - in this case, it will quickly whip to a creamy consistency and the filling will not be lumpy. In most cases, after whipping the cheese and adding the remaining ingredients for the filling, the mass is practically not whipped, but stirred until smooth. This is done so that the filling does not become oversaturated with air and the cheesecake does not swell during baking. It is best to stir the mixture by hand using a whisk.
Eggs should be added to the filling one at a time, mixing the mixture thoroughly each time.
Baking
The optimal temperature for baking cheesecake is 160 degrees, the maximum is 175. It is better to turn the oven on to the lower mode, and place the pan on the middle level.
Water bath
Baking in a water bath offers several benefits. Firstly, the heat from water is more uniform than from an oven. Secondly, cheesecakes in a water bath turn out more tender and silky. And thirdly, when baking in a water bath, the top of the cheesecake does not burn, which is important.
In order to build a water bath, you need to tightly wrap the cheesecake pan with foil (the piece of foil must be solid) and place it in another, larger pan. Then you need to pour boiling water into a large pan so that it reaches at least halfway up the sides of the pan with the cheesecake. The water must be boiling, otherwise the baking time will be extended due to the fact that the water will need to boil in the oven. If you do not have foil of the required width, you can use a cut and flattened baking sleeve instead.
As a lazy person, I most often bake cheesecakes without a bath, but I always place a large container of boiling water on the bottom of the oven. But you can only do this if you are completely confident in yourself and your oven.
Readiness
It is very important not to overcook the cheesecake in the oven, otherwise it may crack when cooling. It’s quite easy to determine if the cake is ready - tap the side of the pan with a spoon: only the middle of the finished cheesecake should shake (5-6 cm in the center).
Cooling
The cheesecake needs to be cooled in several stages. Immediately after turning it off, it must be left for 40-60 minutes in the oven with the door ajar, then kept for half an hour at room temperature. Next, you need to run a knife along the walls of the mold, and after that put it in the refrigerator. Gradual cooling greatly reduces the risk of cracks in the cake.
+ About salmonellosis. In baked cheesecakes, eggs undergo heat treatment, so there is no need to come up with schemes for replacing them with other products.
Cheesecake Recipes.